
The fastest and least expensive solution to learn PLC technology is with a mini controller. There are several brands out there that are reputable and will do the job. For this project, I went with the Click PLC because it is cheap, easy to use, has a good selection of accessories, and is readily available. A few notes about this solution:
- *Disclaimer* I am not an expert and I'm still learning new things about this technology every day. My goal with this is to share the positive takeaways from the time I've put into this and the frustrations that I've experienced along the way. Please consider this a working document as I plan to update it in the future with additional controllers and useful, relative information. Use at your own risk.
Instructions:
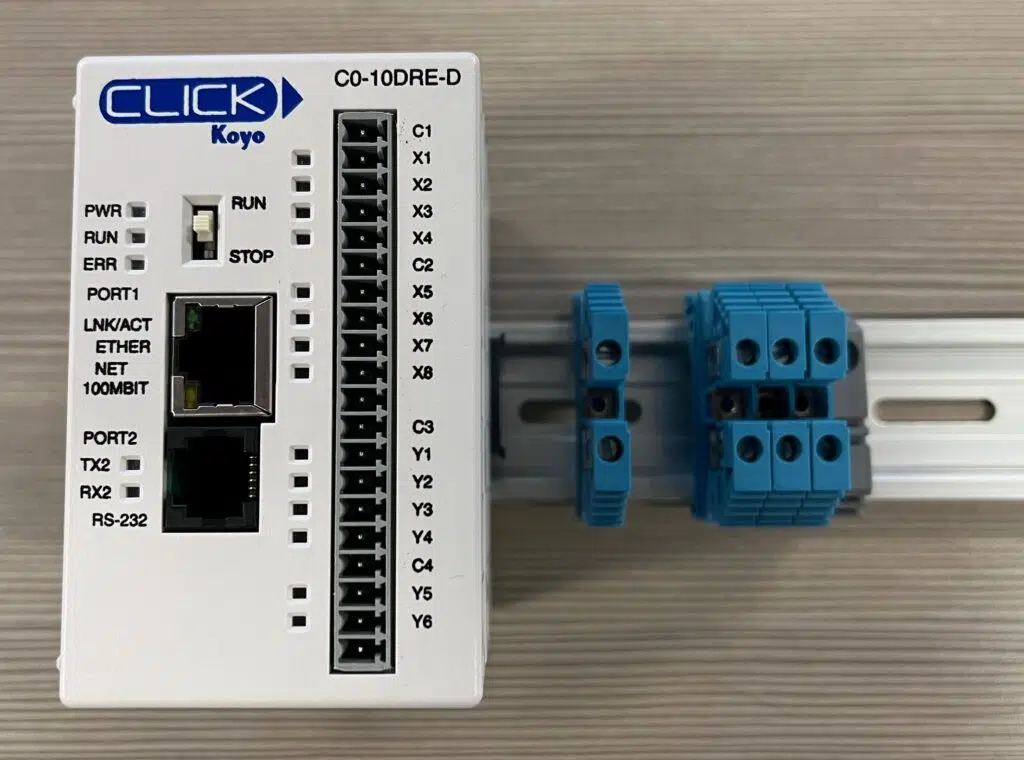
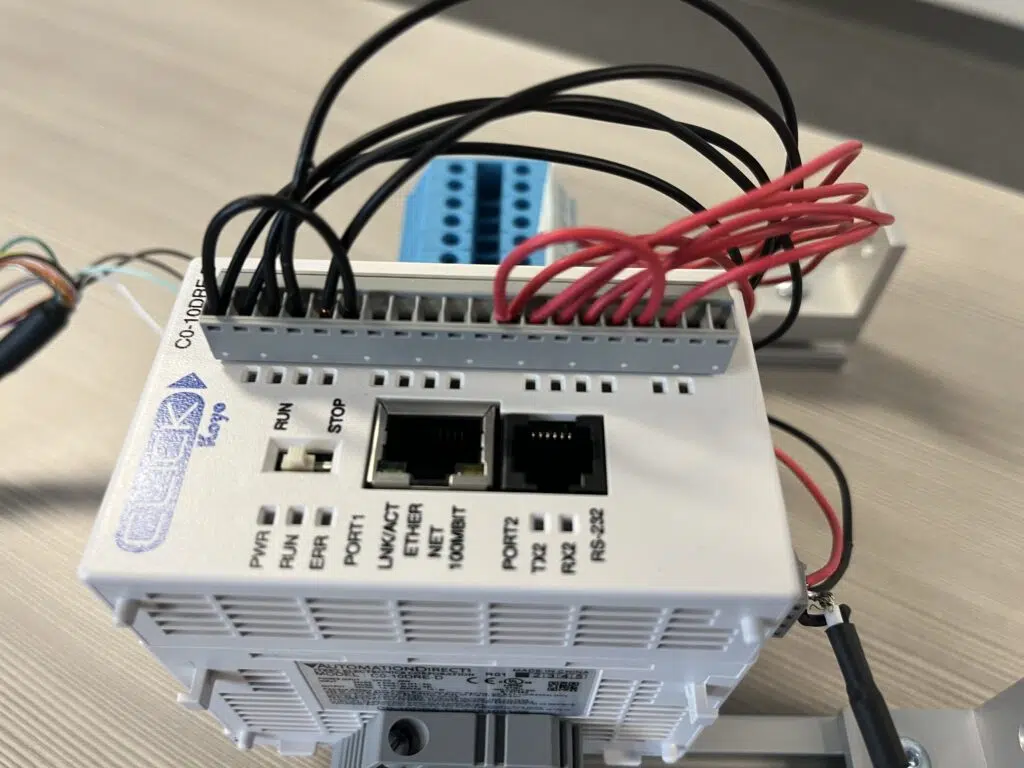
- Once you have received your Click PLC Starter Kit, begin by attaching the PLC to the din rail along with I/O terminal blocks, end caps and end brackets (you can cut the din rail to the appropriate length using a hack saw)
- At this point, a good practice will be to label each of the I/O terminal blocks, keeping Inputs separate from Outputs. I place a piece of masking tape across the blocks after they were all assembled, starting from left to right with 24V, 0V, X1-X8, Y1-Y6.
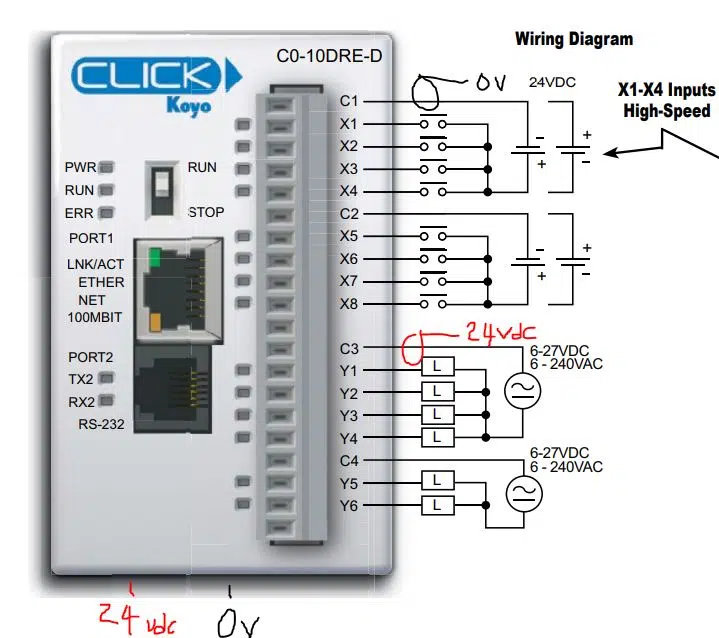
3. Reference the wiring diagram as shown below. A few notes about the wiring:
- The nice thing about this model of the Click is that it only requires 24VDC, which is relatively safe for students to handle.
- If the below wiring diagram is a little confusing, just be sure to make the common for your inputs 0VDC and the ouputs 24VDC.
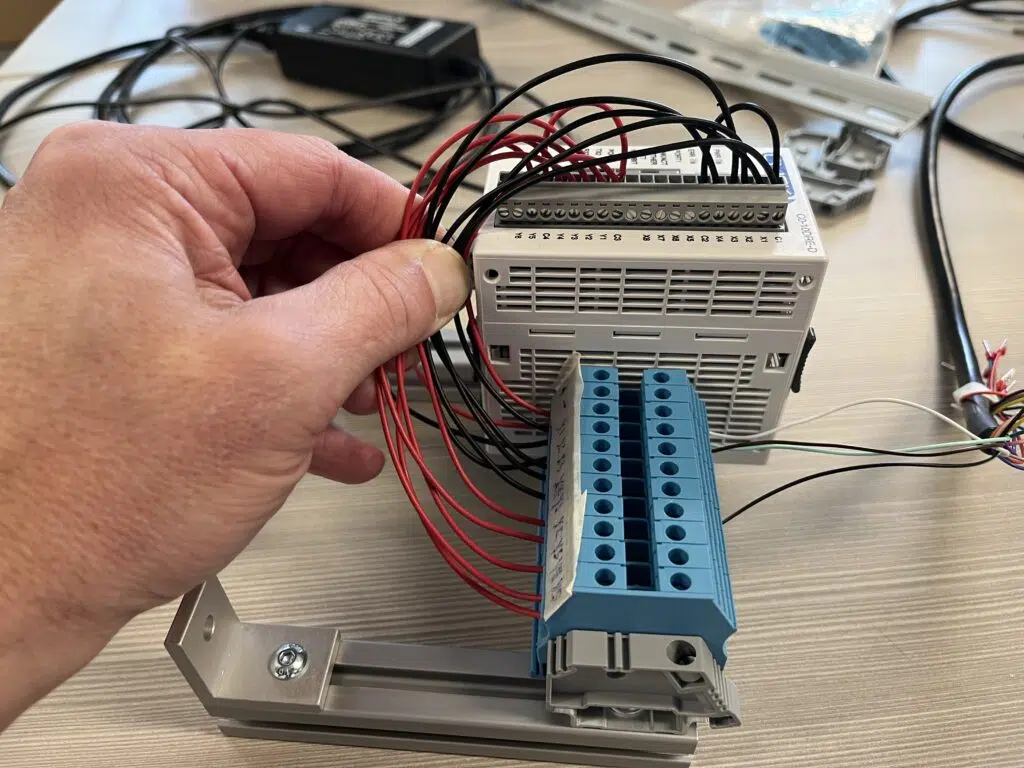
- Use individual strands of wire from the multi conductor cable purchased. Keeping your 24V red and 0VDC black is a good wiring practice.
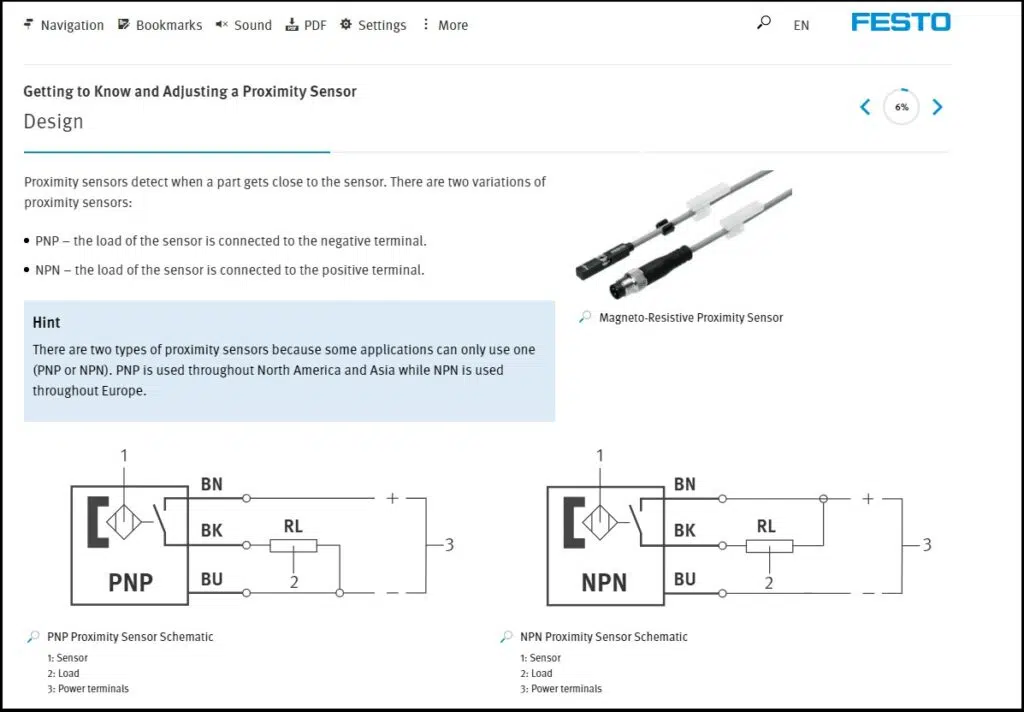
- There is also the subject of sourcing versus sinking related to your I/O components, which may complicate matters. Festo provides a good explanation within the Festo LX curriculum as shown here. However, if you're still confused, just wire your controller the way I have. It should work fine if you're applying it to the Festo MecLab.
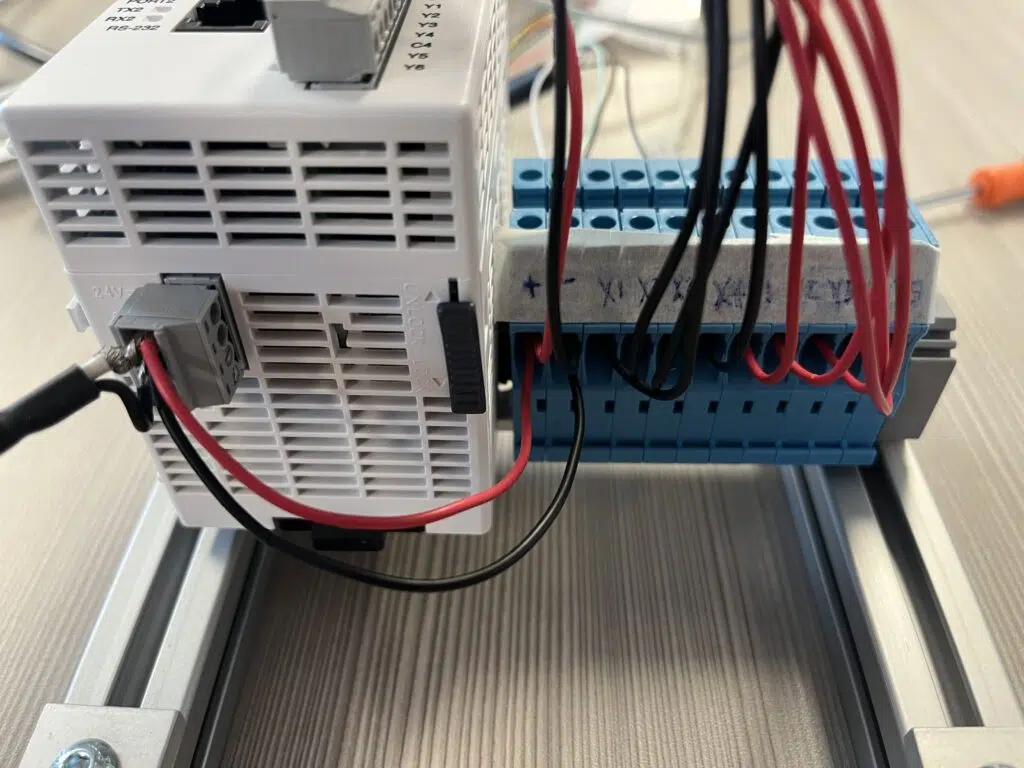
4. There are numerous strategies for how best to manage your wiring. Feel free to follow my method. For wiring, you'll need to jump wires from the power supply on the I/O block to the input power of the PLC. Be careful to take note of the 24VDC and 0VDC connections.
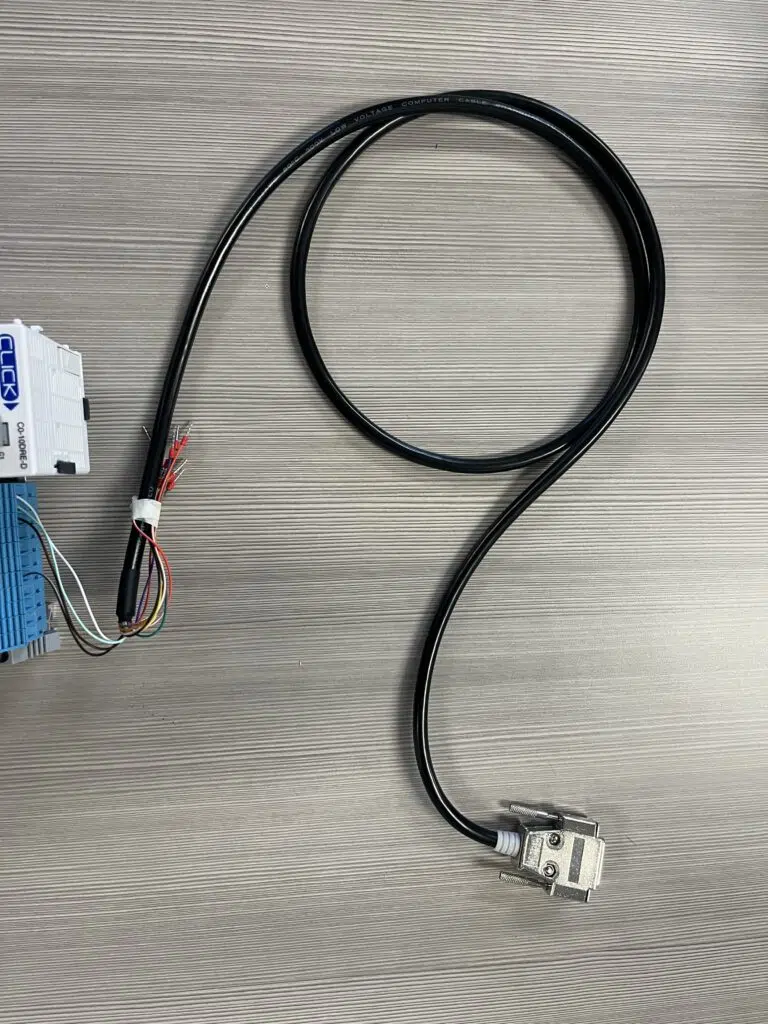
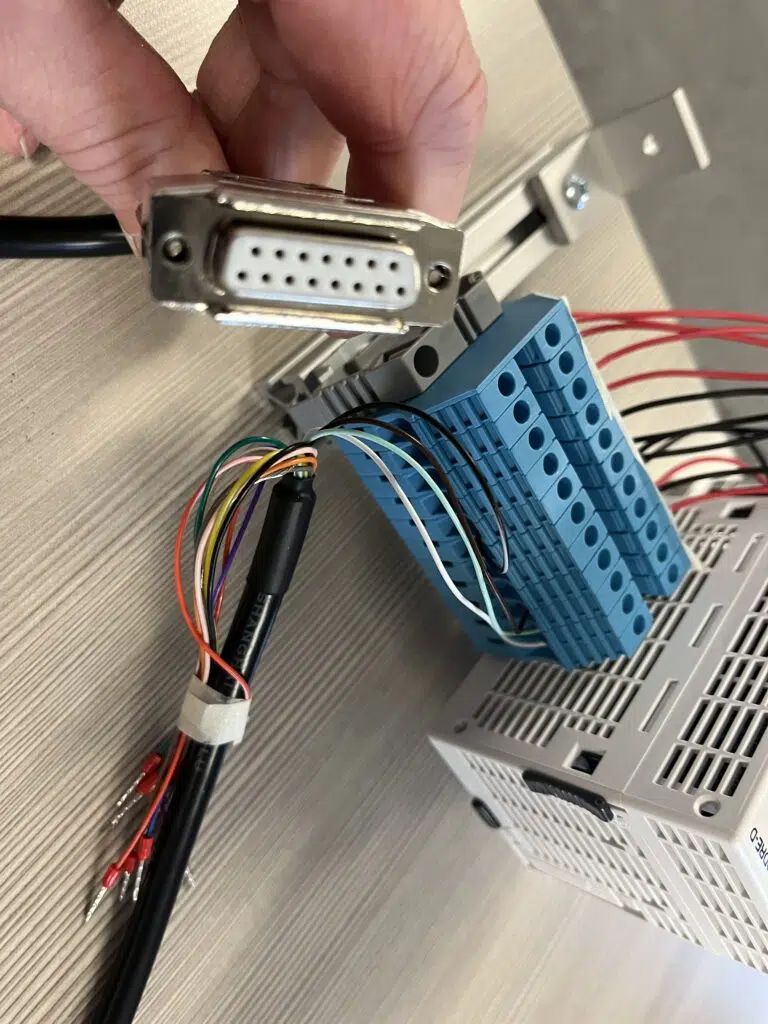
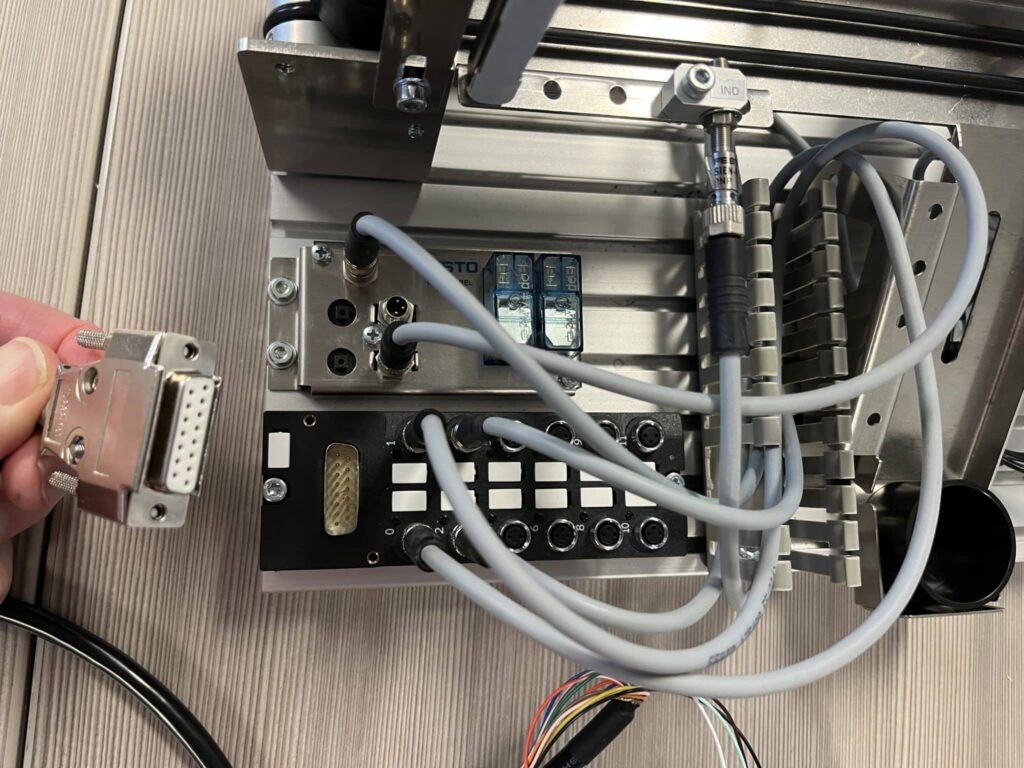
5. The next step is to connect the data cable to the MecLab terminal block. If you purchased the ANMBEST DB15 cable, you'll need to reference connection guides for the Anmbest Cable pinouts and the Festo multipin connector on the MecLab. Connect the corresponding wires to the corresponding terminal block connections on the opposite side, as shown below:
6. For this next step, you will need to be on your own since it requires a download of software from the Automation Direct website:
7. Once you have software and drivers installed, it's time to become familiar with the Click programming software. The fastest way I learned this software is through their series of 10 YouTube videos. For anyone who has a short attention span, these videos are for you! (I think the average time for each is 3 minutes long, so you can learn how to create a program in under 30 minutes! Your students will probably be doing it even faster than that.)
The software developed by each PLC manufacturer has its own nuances. Micro controllers like the Click and the Siemens Logo are very different, but both will help build skills in controller logic.
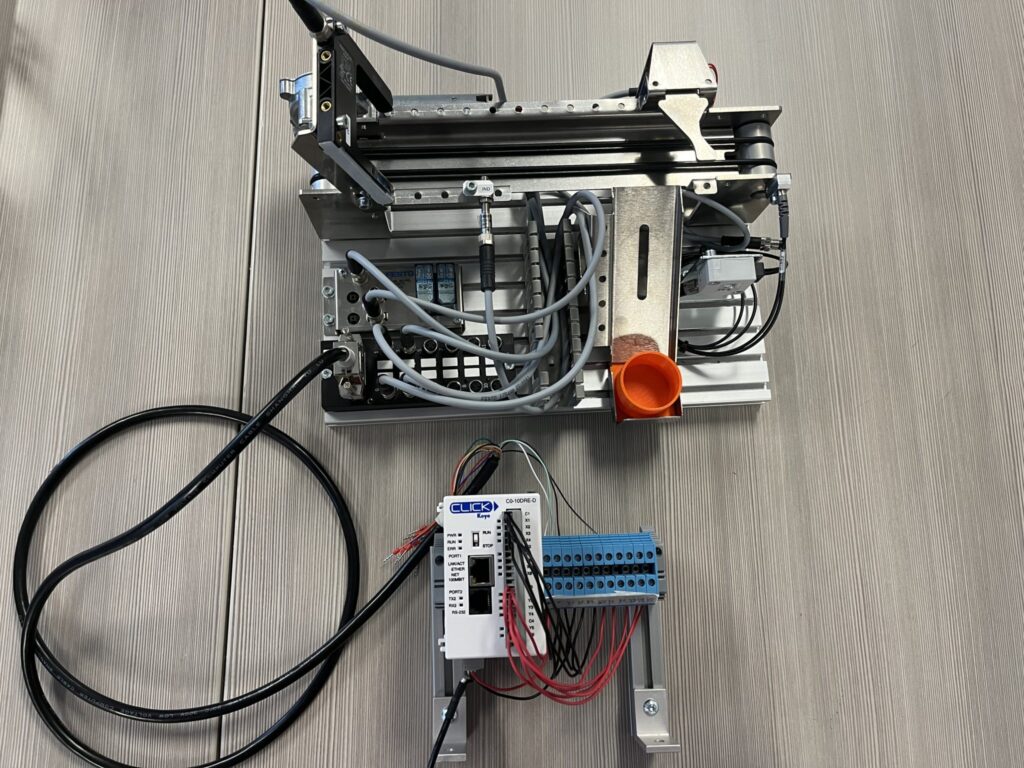
With everything connected properly, your PLC with MecLab application should look similar to this. By following the YouTube videos, you'll create a simple program which defines a few inputs and outputs for a total and 2 rungs of code. Using that simple program, you can make the conveyor move!
Now, have your students program the PLC to get the conveyor to stay on for 5 seconds. Then have them figure out how to sort the different material types. From there, you can apply it to the other Meclab systems. If you have an expansion kit, you can add other components, such as switches, lights, and other pneumatic valves to control more air cylinders, to do crazy out-of-the-box projects and so on!
The goal of this project is not meant to be about "formal training", but more of a fun introduction using a simple, inexpensive control system, that won't bog students down in syntax. With a little more confidence, your students will be able to do even more complex projects like this one:
This post was written by David Kempskie, Principal and Founder of AET Labs. Challenge your students to redesign a Festo MecLab in our team challenge! Learn more here.
